
Shopify Extractor
Pulling data from Shopify
Definite connects to Shopify through a custom app. You provide the app's Client ID and Client Secret, and Definite automatically mints a short-lived Admin API token to sync your data.
Shopify has deprecated admin-created custom app access tokens. If you already have an access token, it still works. See Legacy: connect with an access token.
Create a Shopify app
Create an app in the Shopify Dev Dashboard, grant it the Admin API scopes Definite needs, then install it on your store to get the Client ID and Client Secret.
- Go to the Dev Dashboard.
- Click
Create app, chooseStart from Dev Dashboard, give the app a name, and clickCreate.
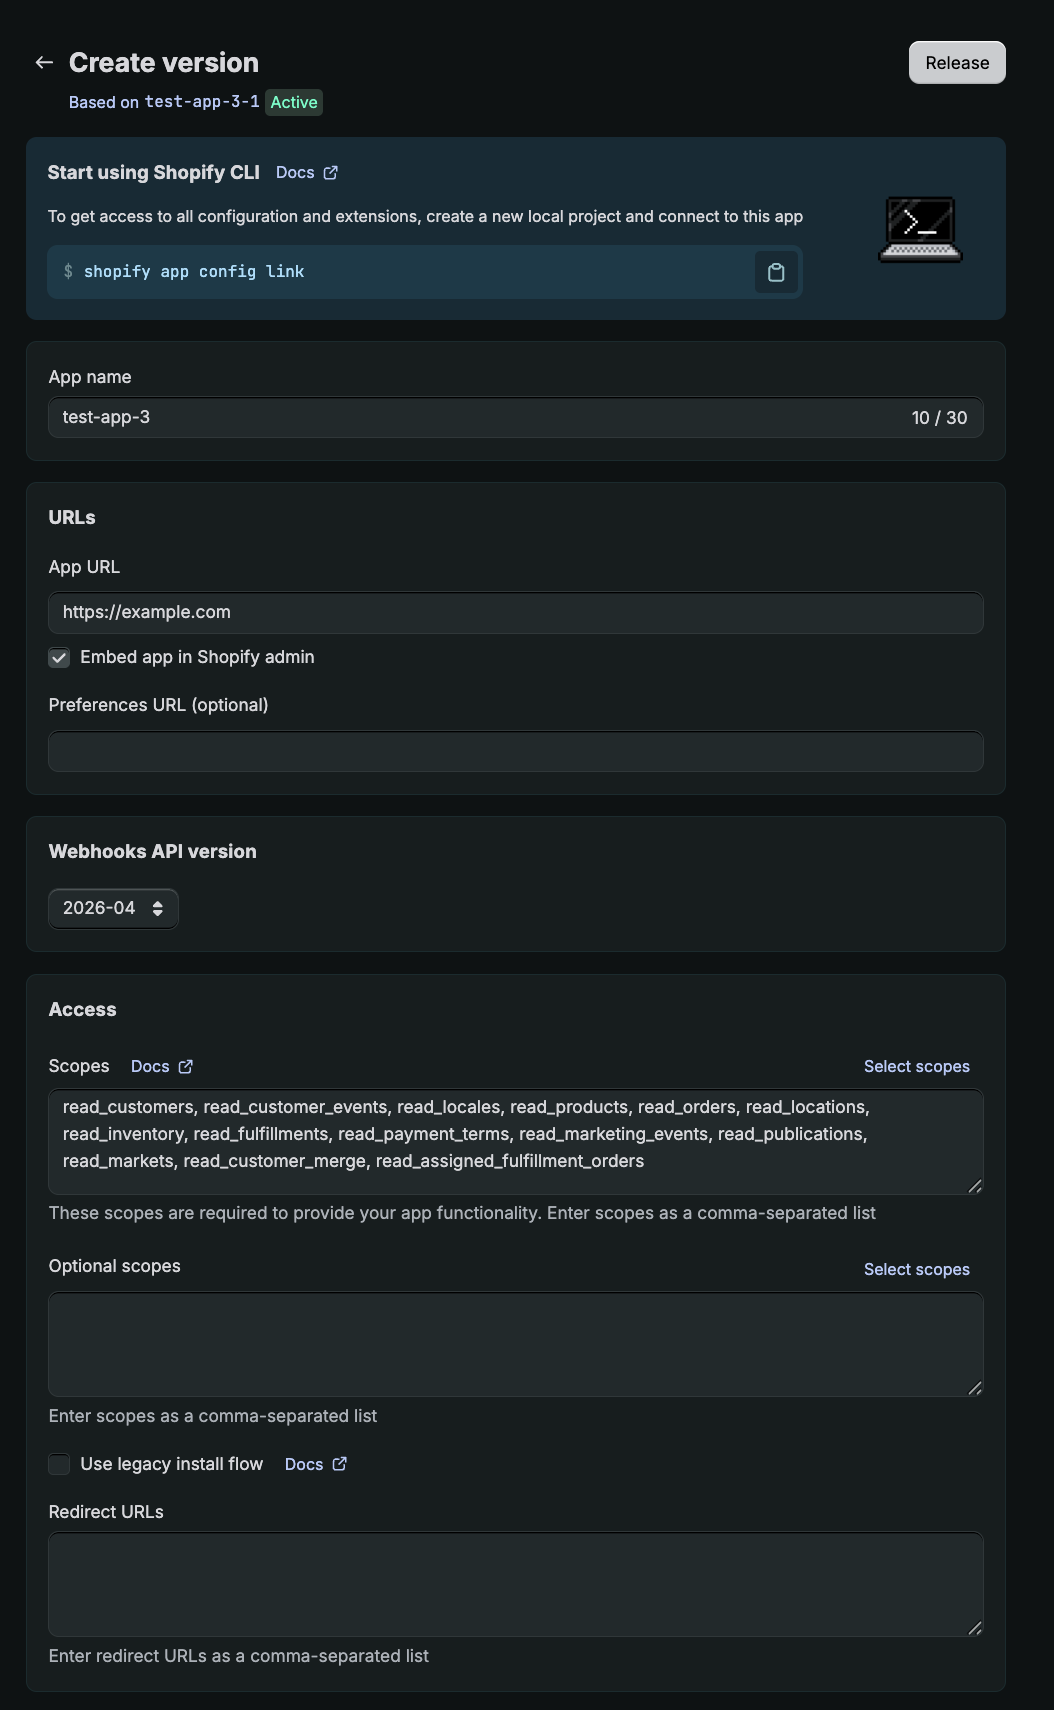
- On the next screen after creating your app, add the following Admin API access scopes (copy and paste works):
read_customers, read_customer_events, read_locales, read_products, read_orders, read_locations, read_inventory, read_fulfillments, read_payment_terms, read_marketing_events, read_publications, read_markets, read_customer_merge, read_assigned_fulfillment_orders
- Release the version to apply the scopes. These scopes are unchanged from the previous setup.
Installing the app is required before Definite can mint an access token from your Client ID and Client Secret. Client credentials only work for an app installed on a store owned by the same organization, so install it on the store you want to sync.
- In the Dev Dashboard, scroll down to the your newly created app, open it, and click on Install app
- Shopify opens your store admin at admin.shopify.com and shows the Admin API scopes the app is requesting.
- Review the scopes and click
Installto grant access and finish the installation.
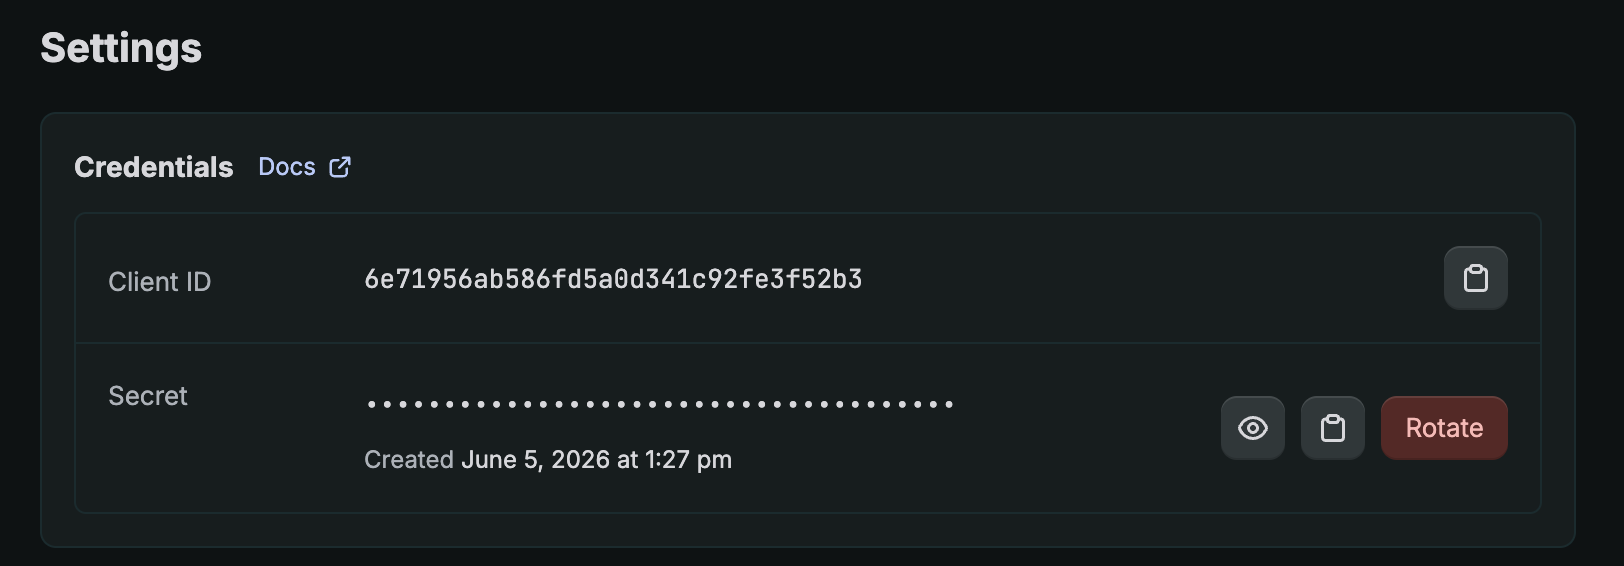
- In your app, go to Settings and copy the Client ID and Secret.
- You'll paste these into Definite below. Definite mints a fresh token from them on each sync, so there's nothing else to rotate.
Find your Shopify Store ID
In Shopify, your Store ID is typically your unique .myshopify.com URL, which serves as your store's primary identifier. To locate it:
- Navigate to https://www.shopify.com/login and enter your credentials.
- Once logged in, observe the URL in your browser's address bar.
- It should resemble:
https://{your-store-id}.myshopify.com/admin. - Here,
{your-store-id}.myshopify.comis your unique Store ID.
Add the integration in Definite
Go to this link to add an integration. Search for our Shopify extractor and click it to get to the creation form. You should see a screen like this:
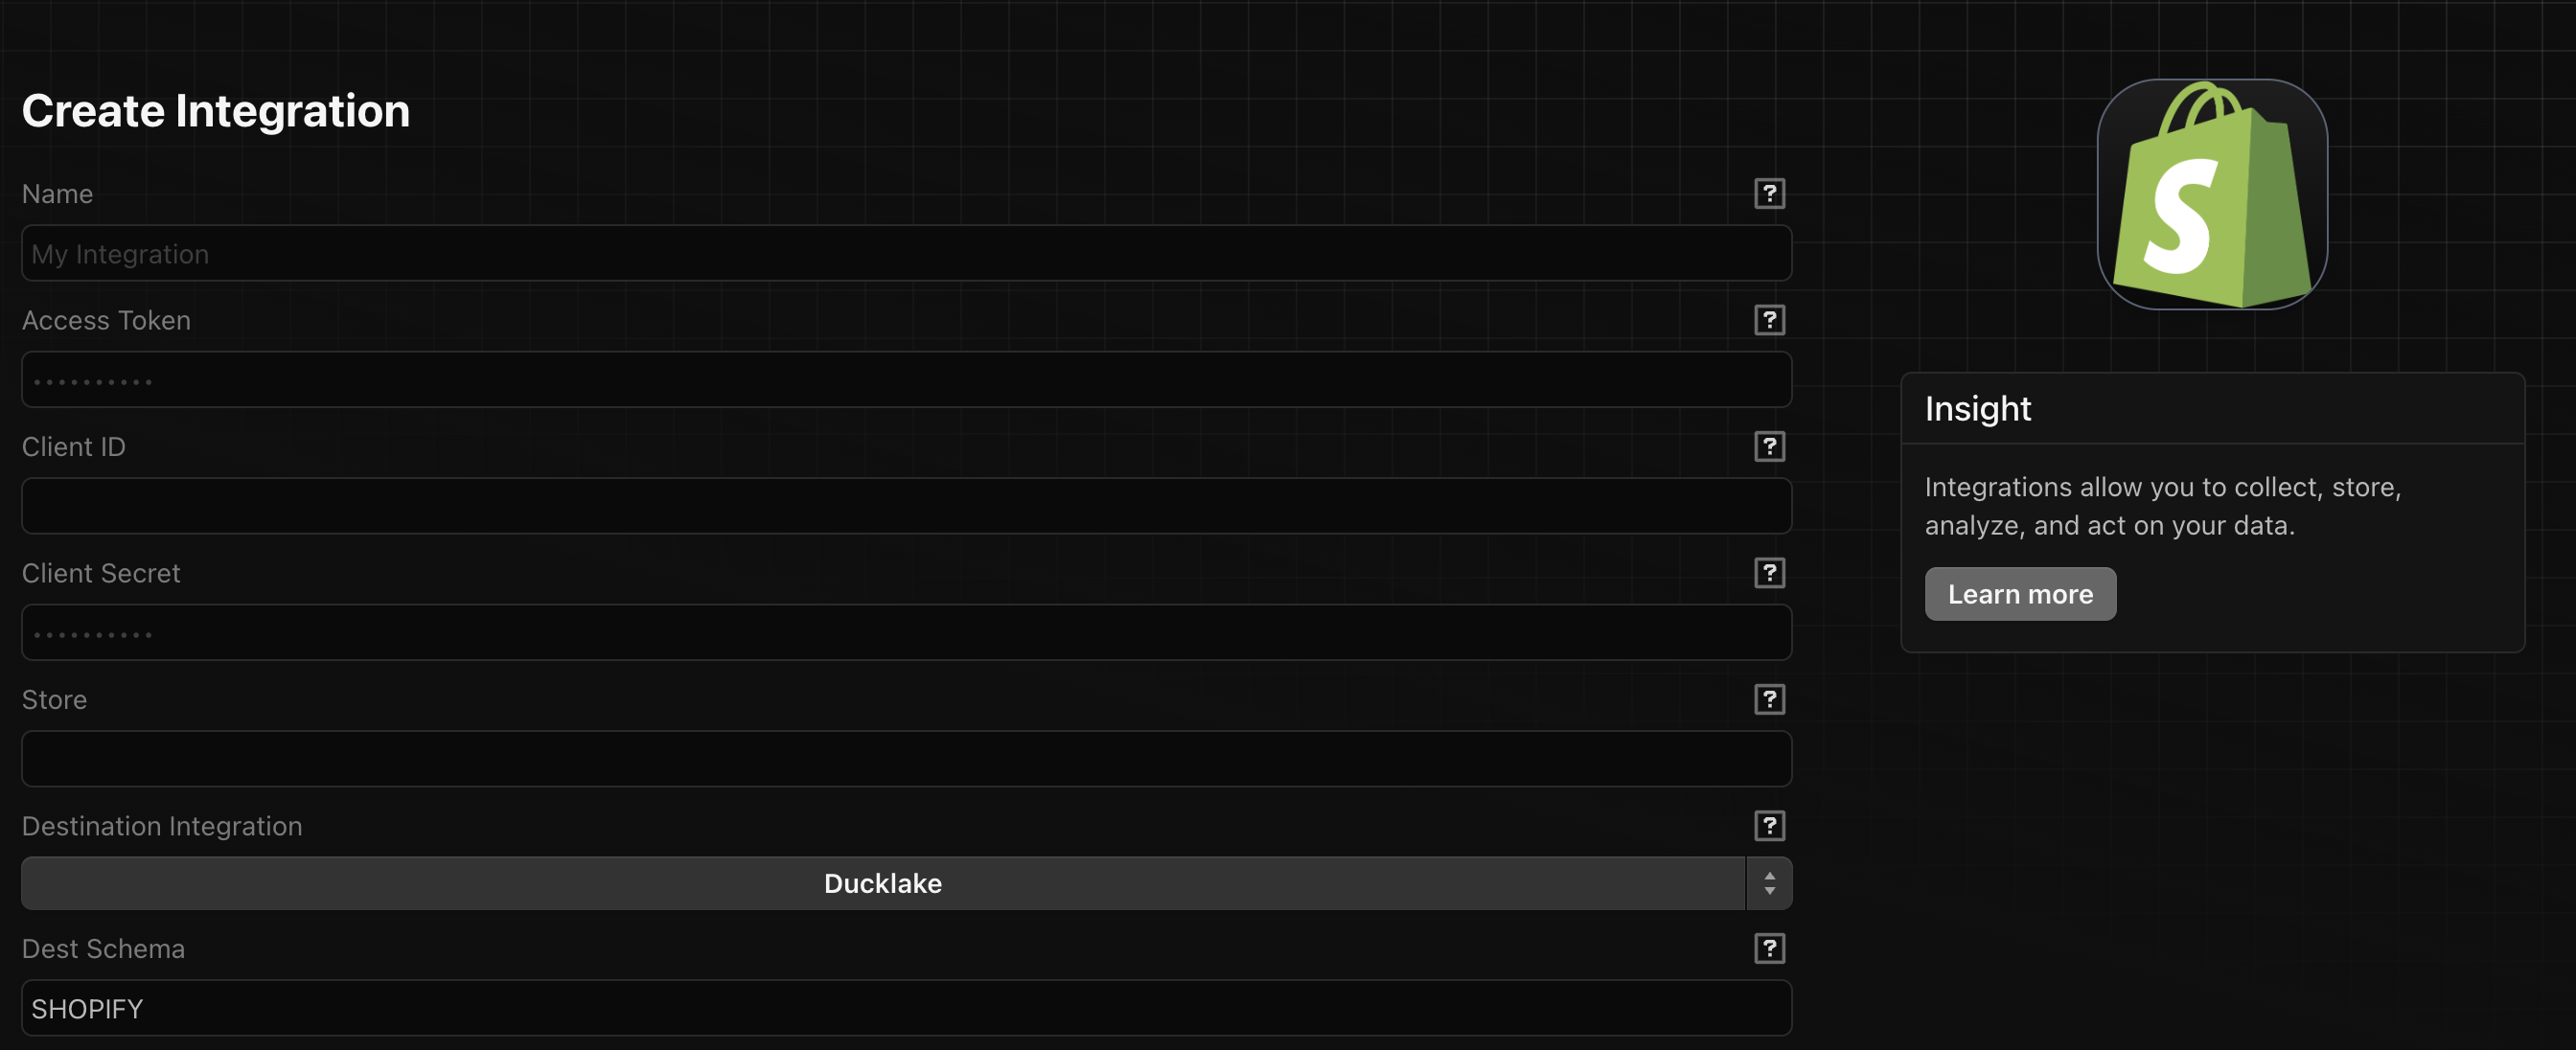
Add a name for your integration, then enter your Client ID, Client Secret, and Store ID. Leave Access Token blank (that is used for legacy Shopify apps).
Make sure the use EL toggle is turned on.
Select your target integration (where the data will be extracted to). In most setups this will be duckdb.
Select a cadence of sync then click Save.
Legacy: connect with an access token
Shopify has deprecated admin-created custom apps (the Develop apps section in your Shopify admin). Existing apps and their access tokens continue to work, but create any new app in the Dev Dashboard using the Client ID and Secret flow above.
If you already have an Admin API access token from a custom app created in your Shopify admin, you can connect with that token directly instead of a Client ID and Secret.
- In your Shopify admin, go to Settings > Apps and sales channels > Develop apps, and open your app.
- On the API credentials tab, under Admin API access token, click
Reveal token onceto view your access token. - Store this token securely. Shopify only displays it once. If you lose it, you'll need to generate a new one.
- In the Definite Shopify form, paste the token into the Access Token field, and leave Client ID and Client Secret blank.
- Add your Store ID, then complete the remaining steps above.